【Flutter】 ダイアログを出す方法
FlutterのダイアログにはAlertDialogとSimpleDialogの二つがあります。
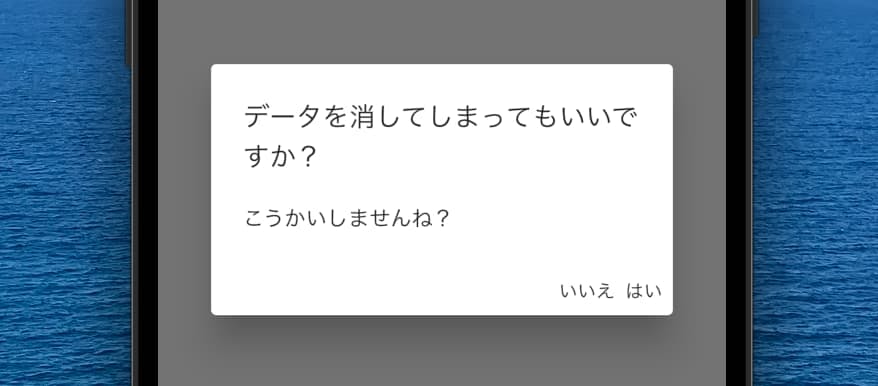
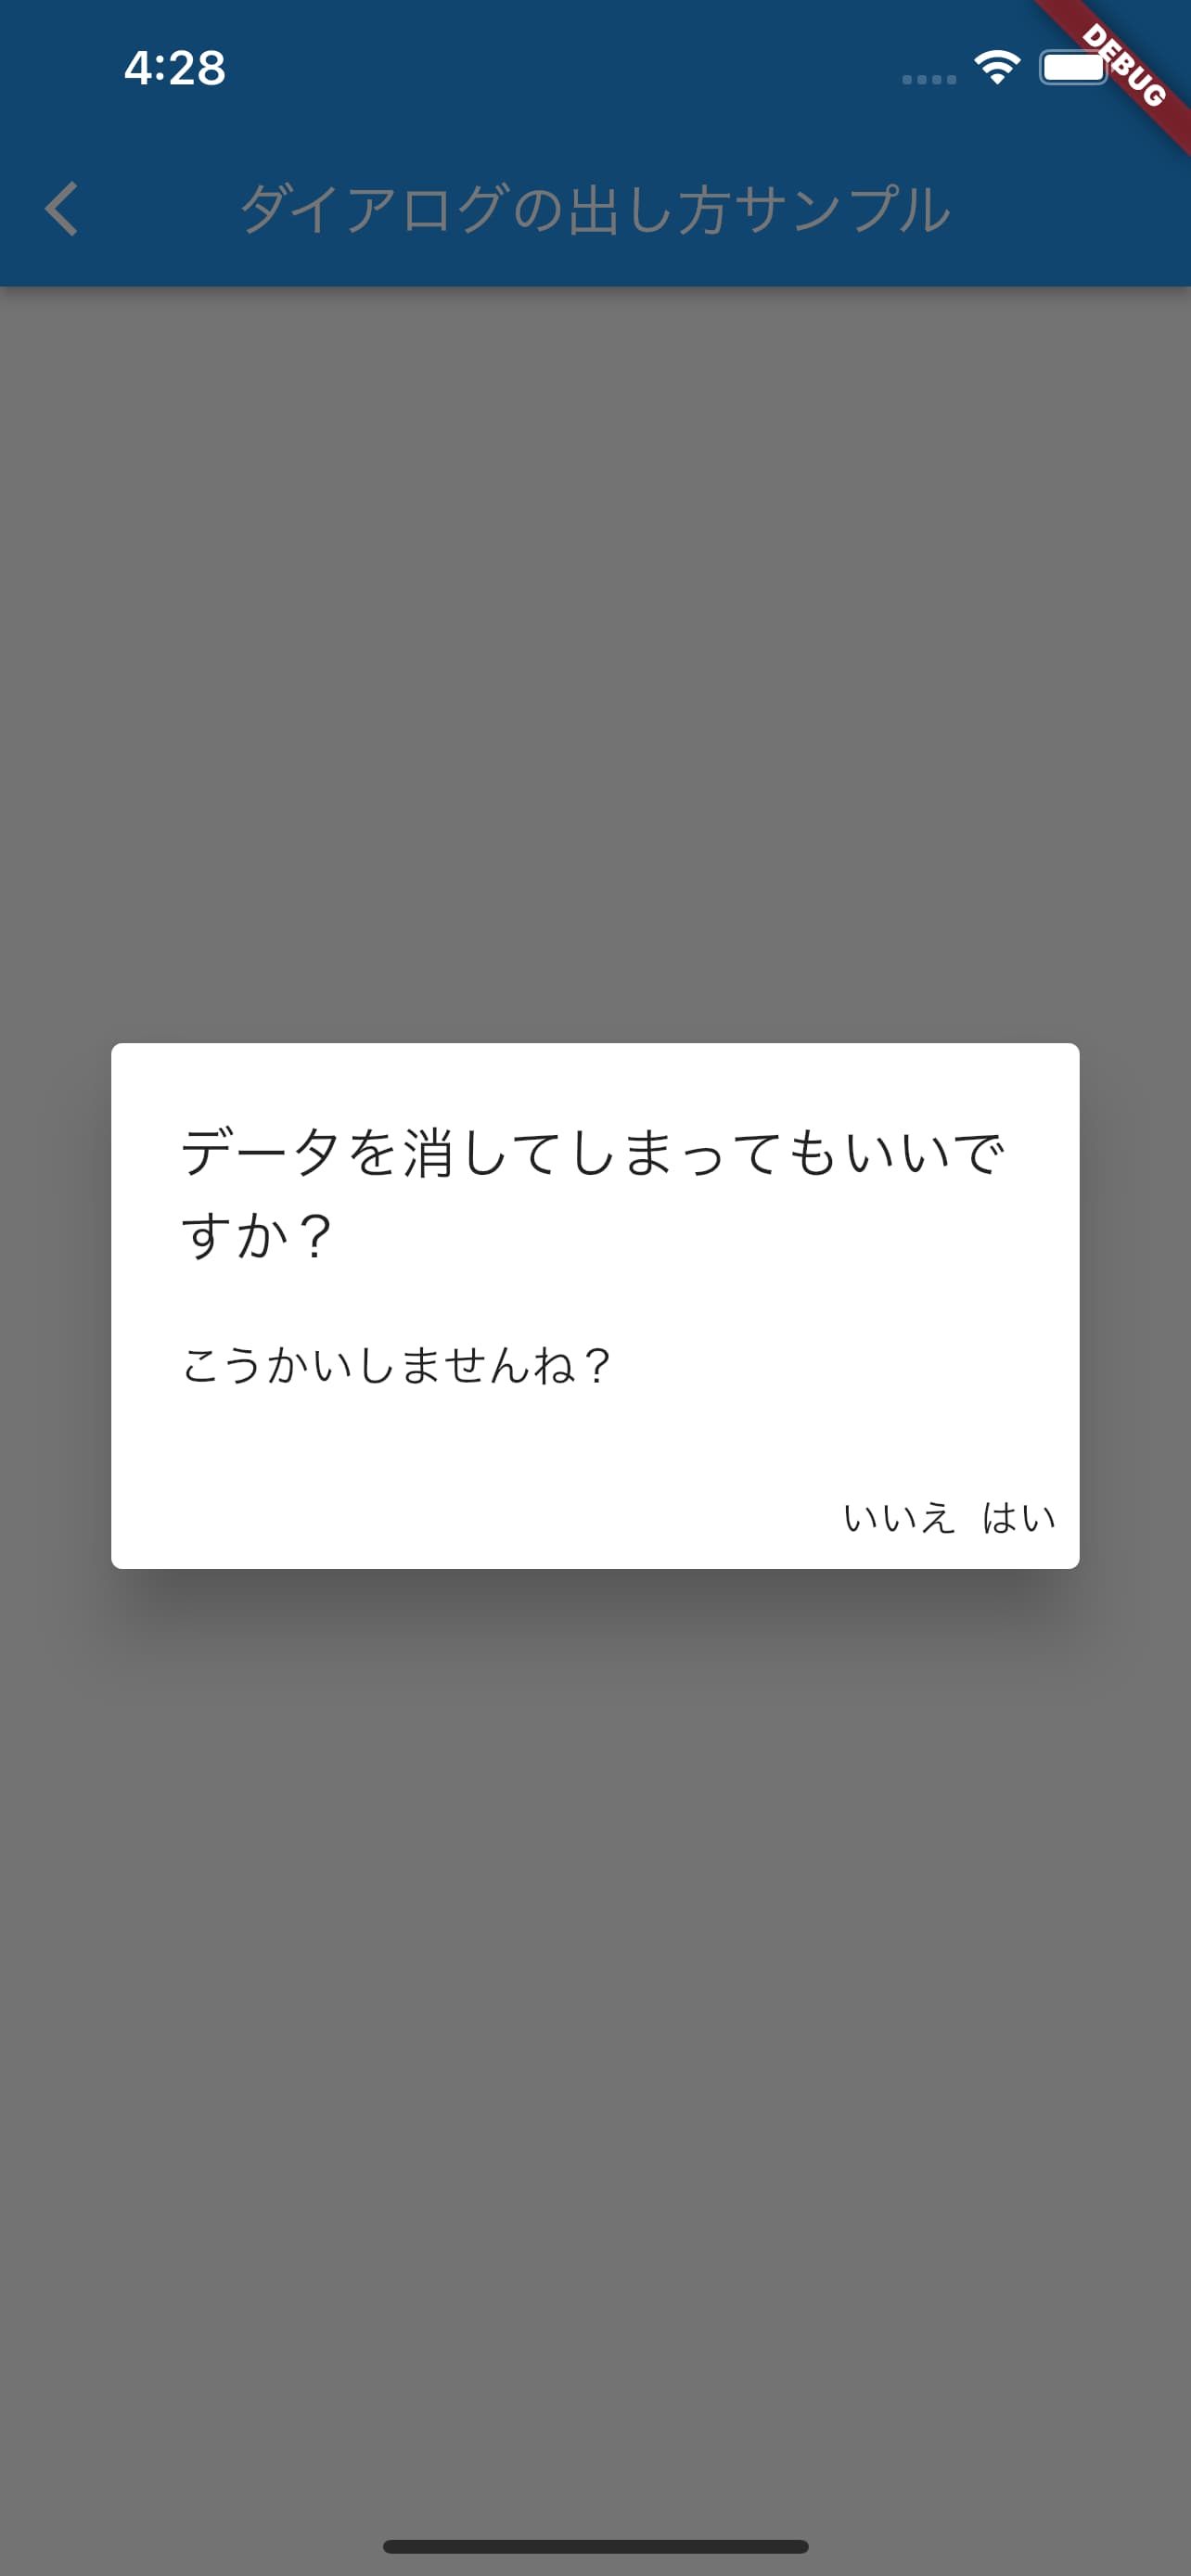
AlertDialogはいわゆる普通のダイアログで、確認をする場合などに使います。
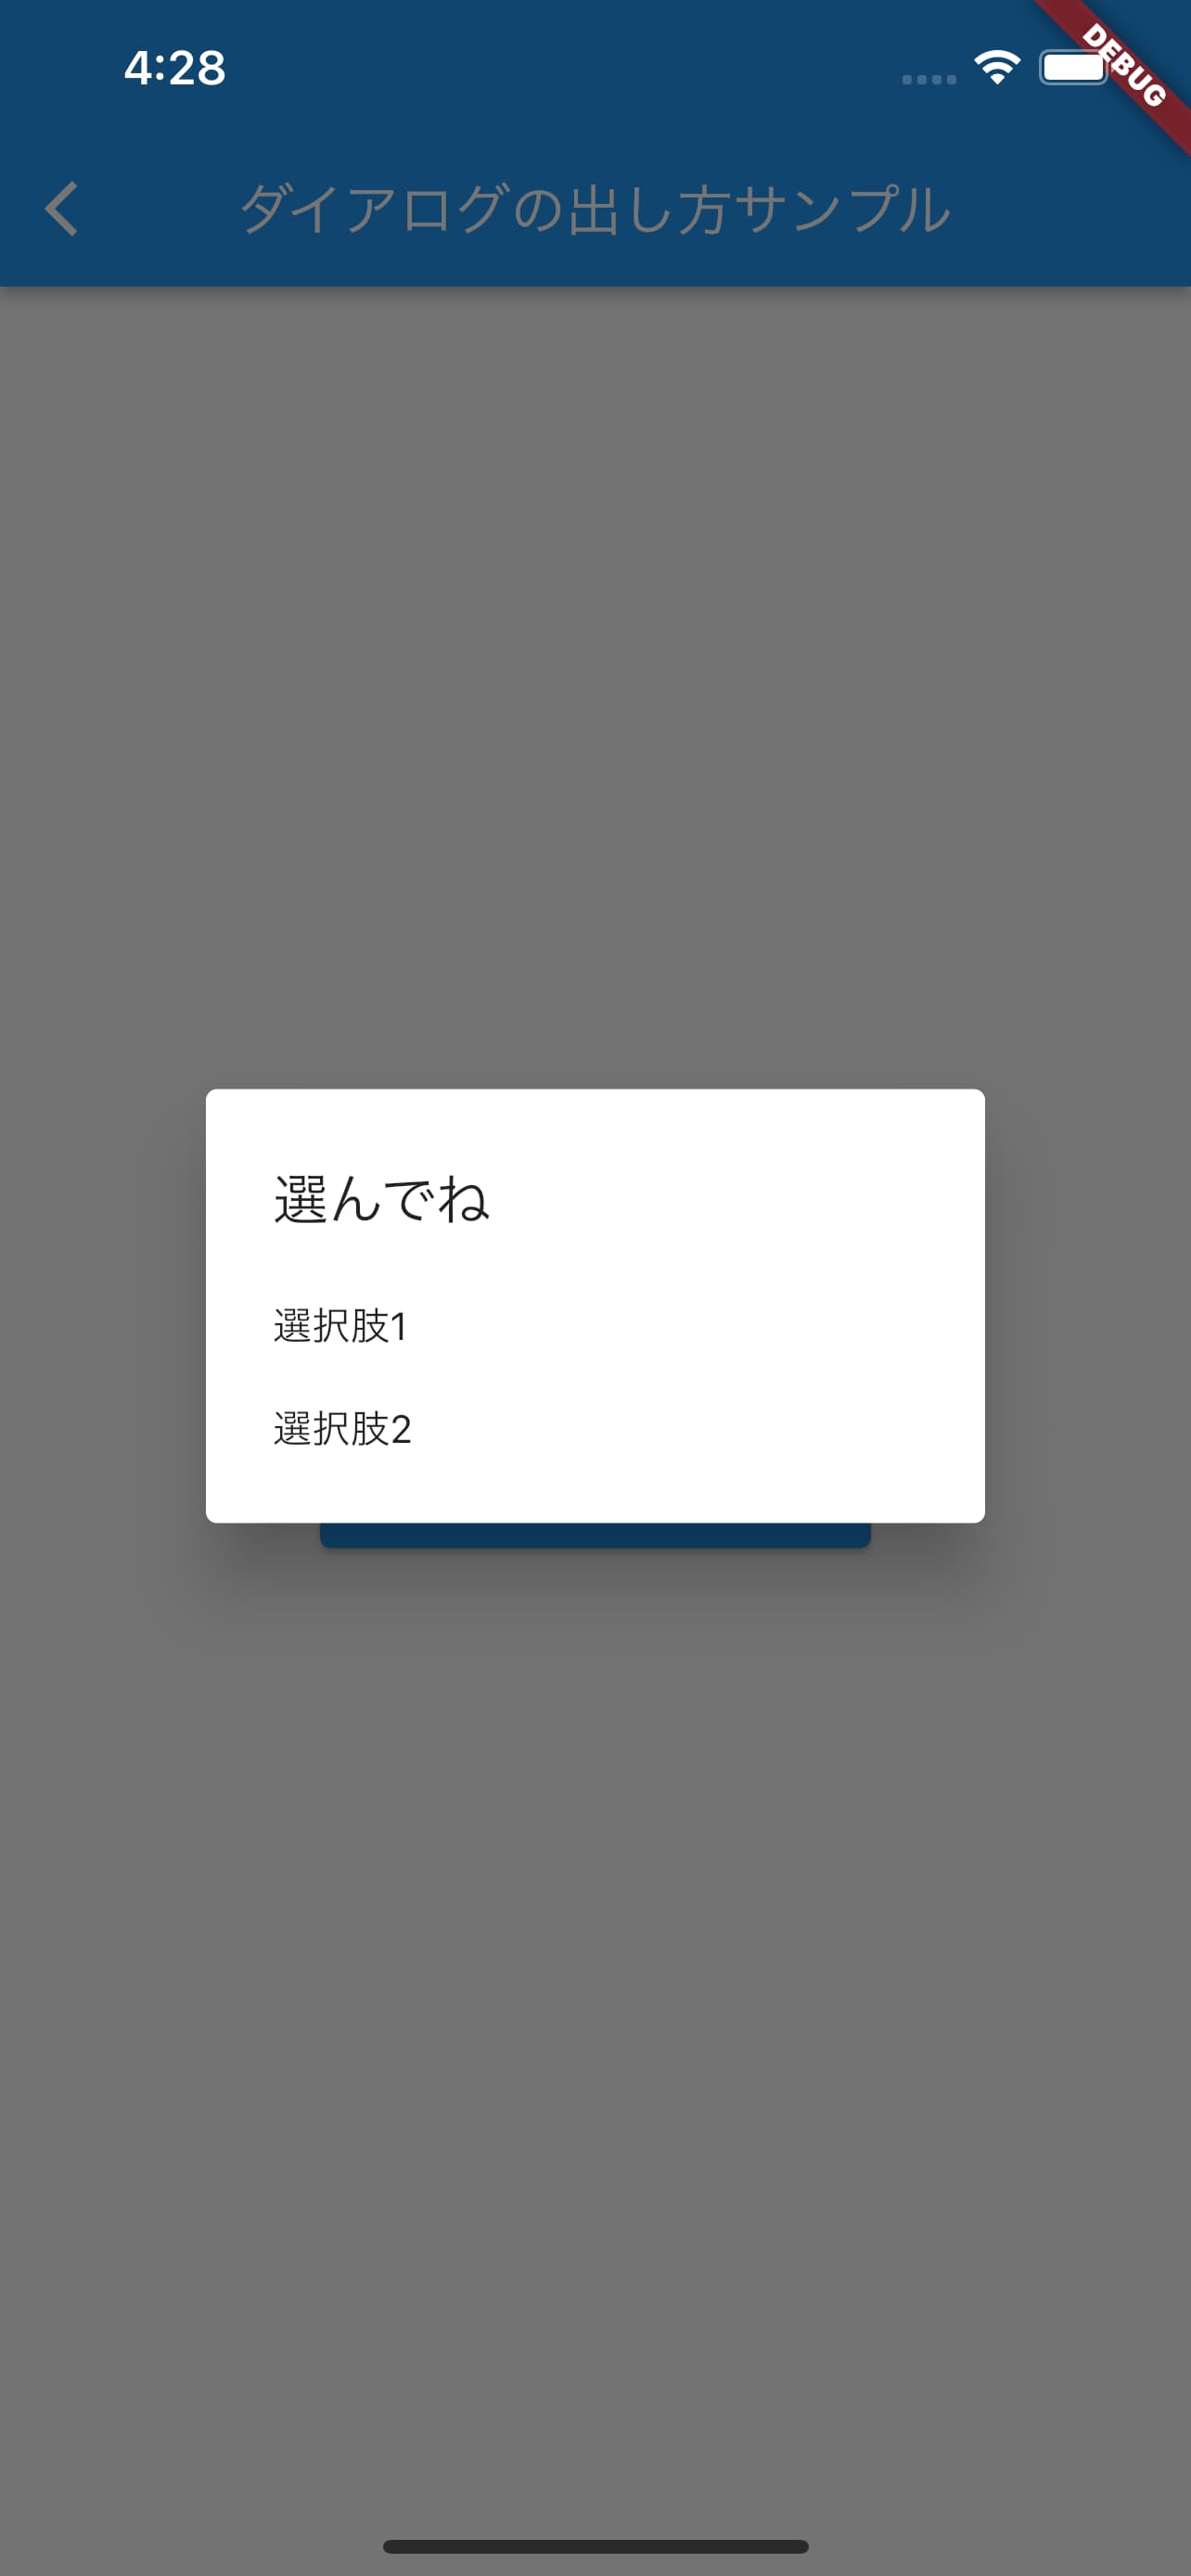
SimpleDialogは複数の選択肢から選んでもらう場合などに使います。
どちらのダイアログもshowDialogメソッドを使って呼び出します。
Version
- Flutter 2.8.1
- Dart 2.15.1
AlertDialogの使い方
1)AlertDialogを作る
まずはAlertDialogウィジェットを使ってダイアログを作ります。
class AlertDialogSample extends StatelessWidget {
const AlertDialogSample({Key? key}) : super(key: key);
Widget build(BuildContext context) {
return AlertDialog(
title: Text('データを消してしまってもいいですか?'),
content: Text('こうかいしませんね?'),
actions: <Widget>[
GestureDetector(
child: Text('いいえ'),
onTap: () {
Navigator.pop(context);
},
),
GestureDetector(
child: Text('はい'),
onTap: () {},
)
],
);
}
}
2)showDialogメソッドでダイアログを呼び出す
showDialogを使ってダイアログに移動します。これだけです。
  ElevatedButton(
    child: Text('アラートダイアログを表示'),
    onPressed: () {
      showDialog<void>(
          context: context,
          builder: (_) {
            return AlertDialogSample();
          });
    },
  )
SimpleDialogの使い方
1)SimpleDialogの定義
SimpleDialogウィジェットを使ってダイアログを作ります。
今回はString型の値を遷移元のページに返すようにしています。
class SimpleDialogSample extends StatelessWidget {
const SimpleDialogSample({Key? key}) : super(key: key);
Widget build(BuildContext context) {
return SimpleDialog(
title: Text('選んでね'),
children: [
SimpleDialogOption(
child: Text('選択肢1'),
onPressed: () {
Navigator.pop(context, '1が選択されました');
},
),
SimpleDialogOption(
child: Text('選択肢2'),
onPressed: () {
Navigator.pop(context, '2が選択されました');
},
)
],
);
}
}
2)showDialogメソッドでダイアログを呼び出す
showDialogメソッドを呼び出す際にこのように書けば、ダイアログで選択した値がselectedTextに入ってきます。
  ElevatedButton(
    child: Text('シンプルダイアログを表示'),
    onPressed: () async {
      final String? selectedText = await showDialog<String>(
          context: context,
          builder: (_) {
            return SimpleDialogSample();
          });
      print(selectedText);
    },
  )
【参考】画面外タップでダイアログが閉じないようにする方法
showDialogメソッド内でreturn以下を次のように変更するだけです。
showDialog<void>(
    context: context,
    builder: (_) {
      return WillPopScope(
        child: AlertDialogSample(),
        onWillPop: () async => false,
      );
    });
コード全文
まずはこれをコピペして動かしてみてから中身を見ていくとわかりやすいかもしれません!
import 'package:flutter/material.dart';
class DialogPage extends StatefulWidget {
const DialogPage({Key? key}) : super(key: key);
_DialogPageState createState() => _DialogPageState();
}
class _DialogPageState extends State<DialogPage> {
Widget build(BuildContext context) {
return Scaffold(
appBar: AppBar(
title: Text('ダイアログの出し方サンプル'),
),
body: Center(
child: Column(
mainAxisAlignment: MainAxisAlignment.center,
children: [
ElevatedButton(
child: Text('アラートダイアログを表示'),
onPressed: () {
showDialog<void>(
context: context,
builder: (_) {
return AlertDialogSample();
});
},
),
ElevatedButton(
child: Text('シンプルダイアログを表示'),
onPressed: () async {
final String? selectedText = await showDialog<String>(
context: context,
builder: (_) {
return SimpleDialogSample();
});
print(selectedText);
},
),
],
),
),
);
}
}
class AlertDialogSample extends StatelessWidget {
const AlertDialogSample({Key? key}) : super(key: key);
Widget build(BuildContext context) {
return AlertDialog(
title: Text('データを消してしまってもいいですか?'),
content: Text('こうかいしませんね?'),
actions: <Widget>[
GestureDetector(
child: Text('いいえ'),
onTap: () {
Navigator.pop(context);
},
),
GestureDetector(
child: Text('はい'),
onTap: () {},
)
],
);
}
}
class SimpleDialogSample extends StatelessWidget {
const SimpleDialogSample({Key? key}) : super(key: key);
Widget build(BuildContext context) {
return SimpleDialog(
title: Text('選んでね'),
children: [
SimpleDialogOption(
child: Text('選択肢1'),
onPressed: () {
Navigator.pop(context, '1が選択されました');
},
),
SimpleDialogOption(
child: Text('選択肢2'),
onPressed: () {
Navigator.pop(context, '2が選択されました');
},
)
],
);
}
}
さいごに
ダイアログに移動するメソッドであるshowDialogと、
ダイアログそのものであるAlertDialog、SimpleDialogの区別がわかりやすいように意識しました。
誰かのお役に立てば幸いです。


可茂IT塾ではFlutter/Reactのインターンを募集しています!
可茂IT塾ではFlutter/Reactのインターンを募集しています!一定以上のスキルをを習得した方には有給でのインターンも受け入れています。
Read More


可茂IT塾ではFlutter/Reactのインターンを募集しています!
可茂IT塾ではFlutter/Reactのインターンを募集しています!一定以上のスキルをを習得した方には有給でのインターンも受け入れています。
Read More