Flutterアプリ開発講座 UI基礎編 その2

チュートリアルを進めるにあたって、コードをコピー・ペーストしないで、手でタイプすることをお勧めします。そうすれば手が動きを覚えるとともに、理解も進むようになるでしょう。
2|Widgetを使ってみる
Container / Row / Columnを使って、正方形を表示させる
中央に赤色の正方形(300×300)を表示させる。Centerの中に以下のコードを書きます。
body: Center(
    child: Container(
      width: 300,
      height: 300,
      color: Colors.red,
    ),
  ),
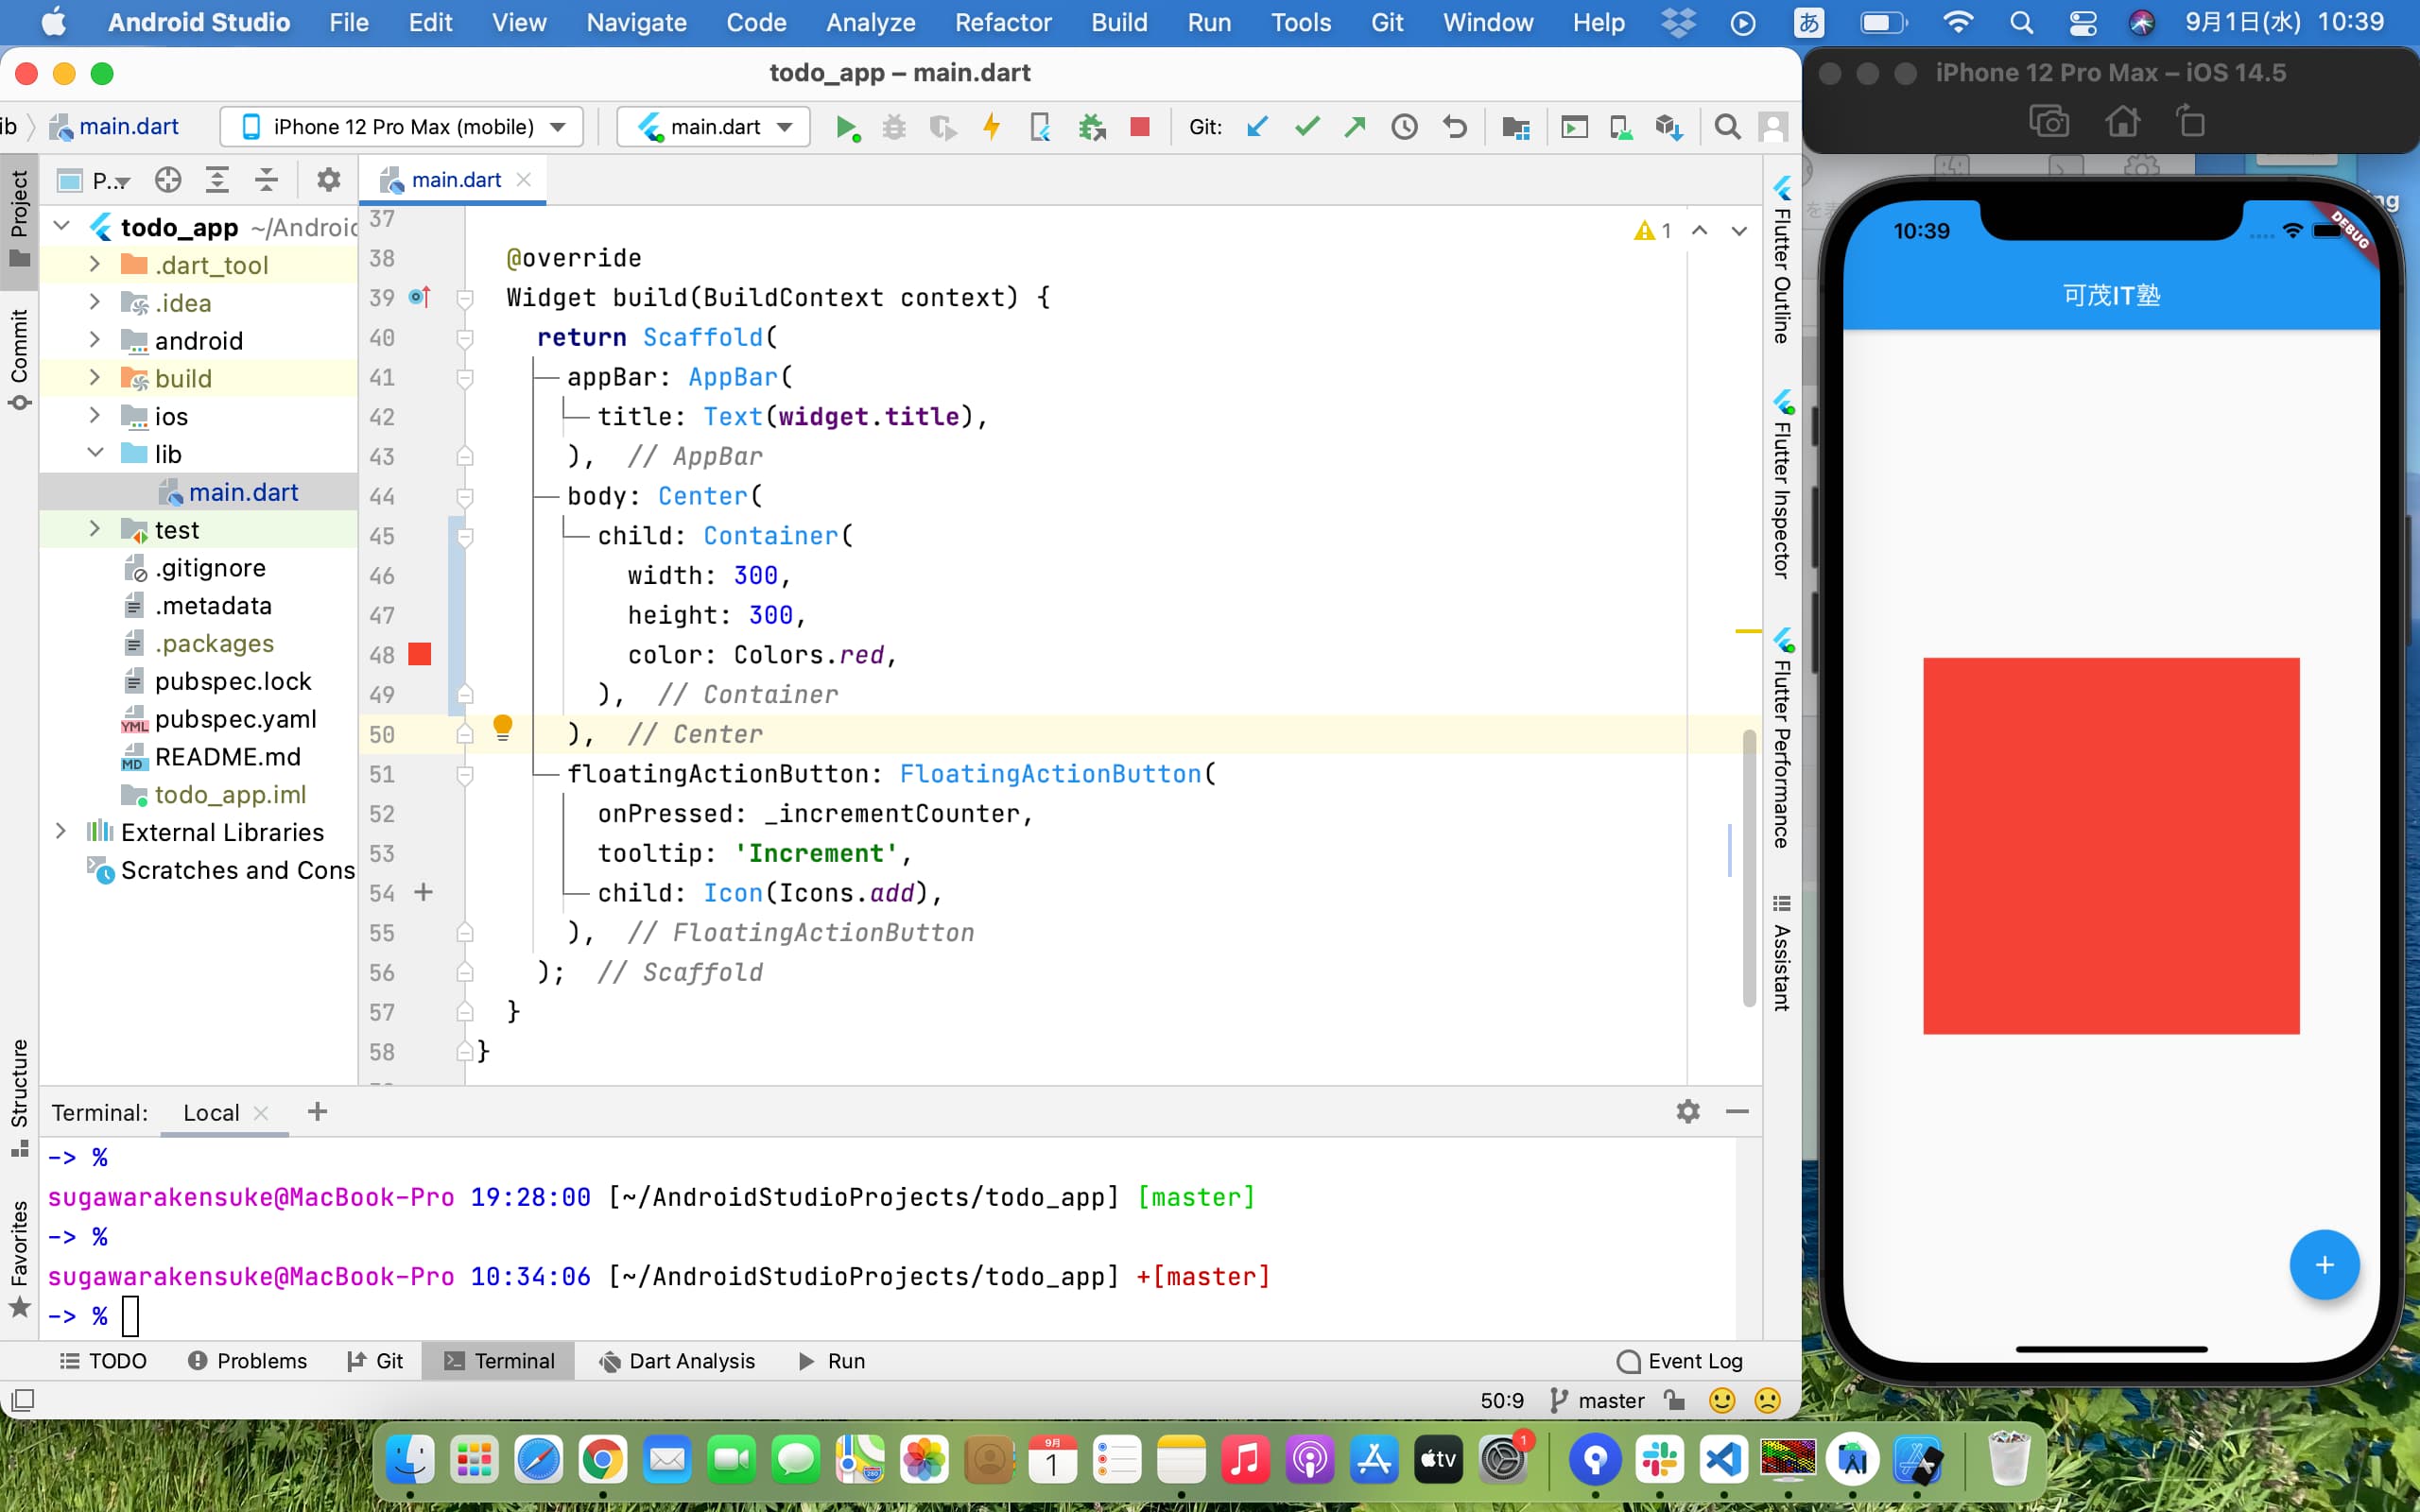
変更後: 300×300の正方形が表示されているはずです👇
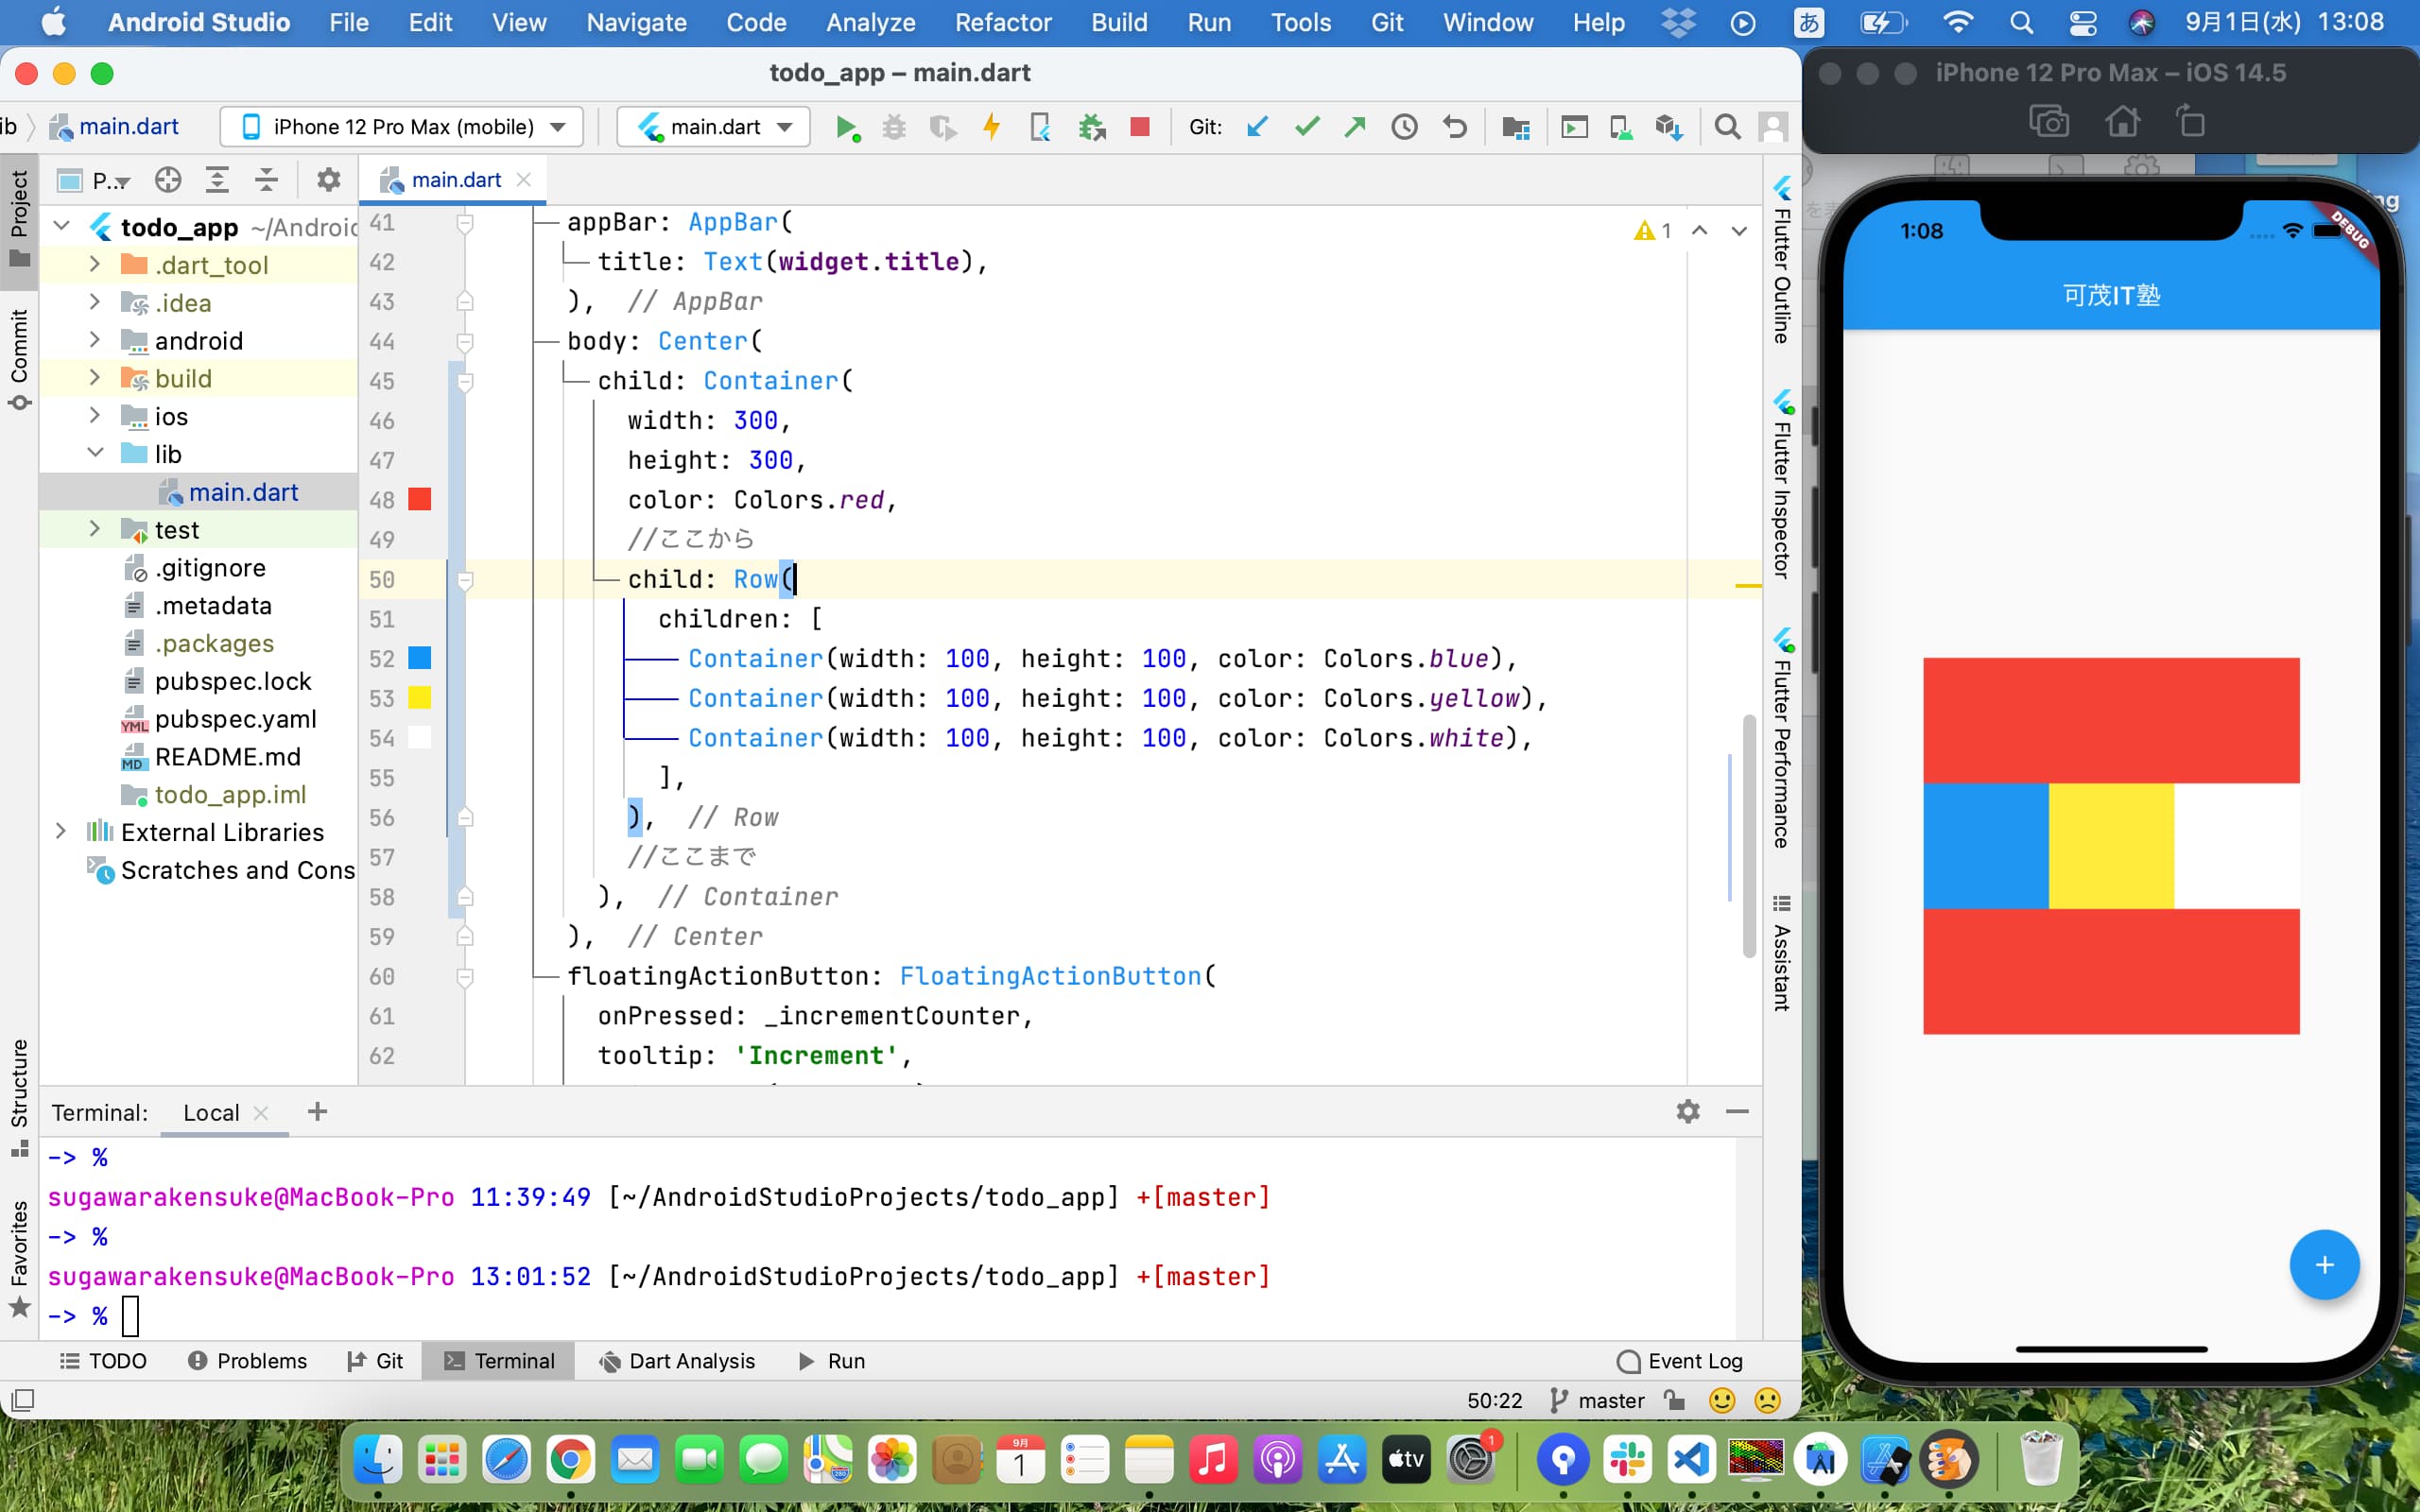
 この中に小さい正方形(100×100)を並べましょう。
Containerウィジェットの子要素を、以下のように設定します。
body: Center(
    child: Container(
      width: 300,
      height: 300,
      color: Colors.red,
      child: Row(
        children: [
          Container(width: 100, height: 100, color: Colors.blue),
          Container(width: 100, height: 100, color: Colors.yellow),
          Container(width: 100, height: 100, color: Colors.white),
        ],
      ),
    ),
  ),
変更後: 100×100の正方形が横に三つ並んでいるはずです👇
Containerは1つのWidgetしか子に持たないからchildプロパティを持つ。
Rowは複数のWidgetを子に持つからchildrenプロパティを持つ。
childrenプロパティには配列が渡されます。
Rowは子要素たちを横並びにするWidget、Columnは子要素たちを縦並びにするWidgetです。
RowとColumnの違いを理解するために、
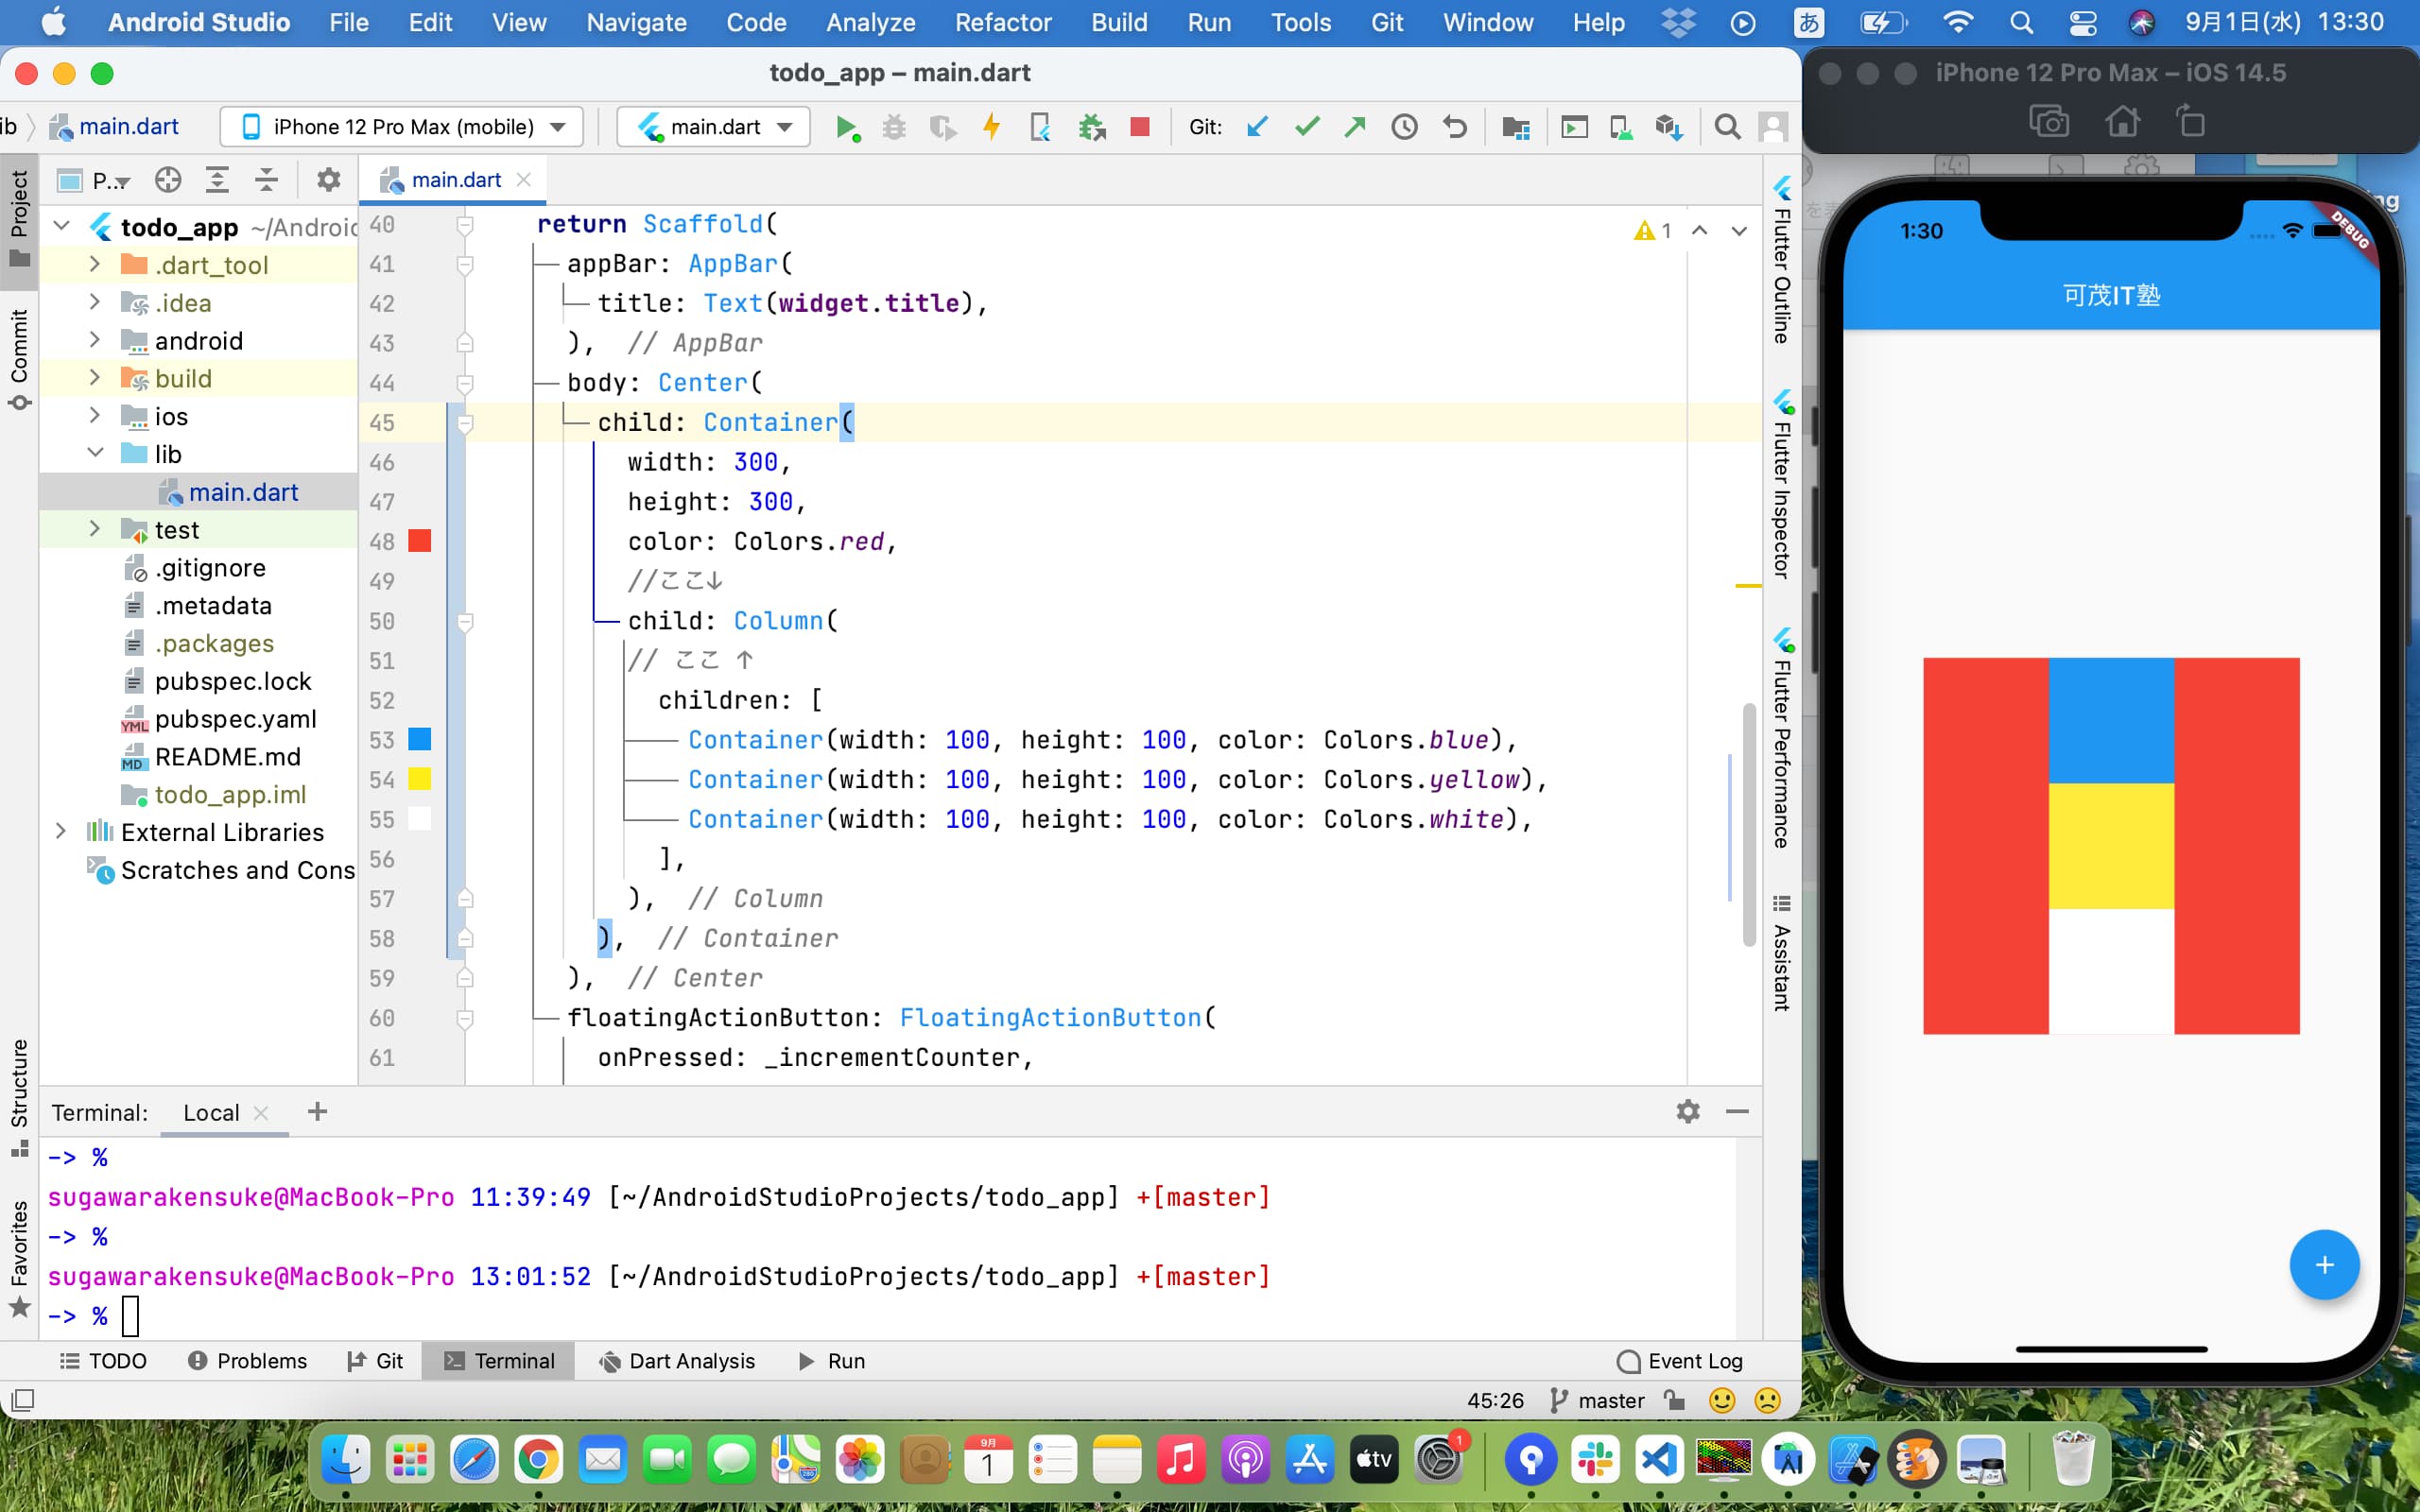
今RowになっているContainerの子要素を、Columnに変更してみましょう。
child: Container(
  width: 300,
  height: 300,
  color: Colors.red,
  child: Column(
    children: [
      Container(width: 100, height: 100, color: Colors.blue),
      Container(width: 100, height: 100, color: Colors.yellow),
      Container(width: 100, height: 100, color: Colors.white),
    ],
  ),
),
変更後: さっきまで横並びだった小さい正方形が縦並びになっているはずです👇